Creating an Appointment
To create an Appointment, follow these steps:
1. On the Start Screen, select Create Appointment.
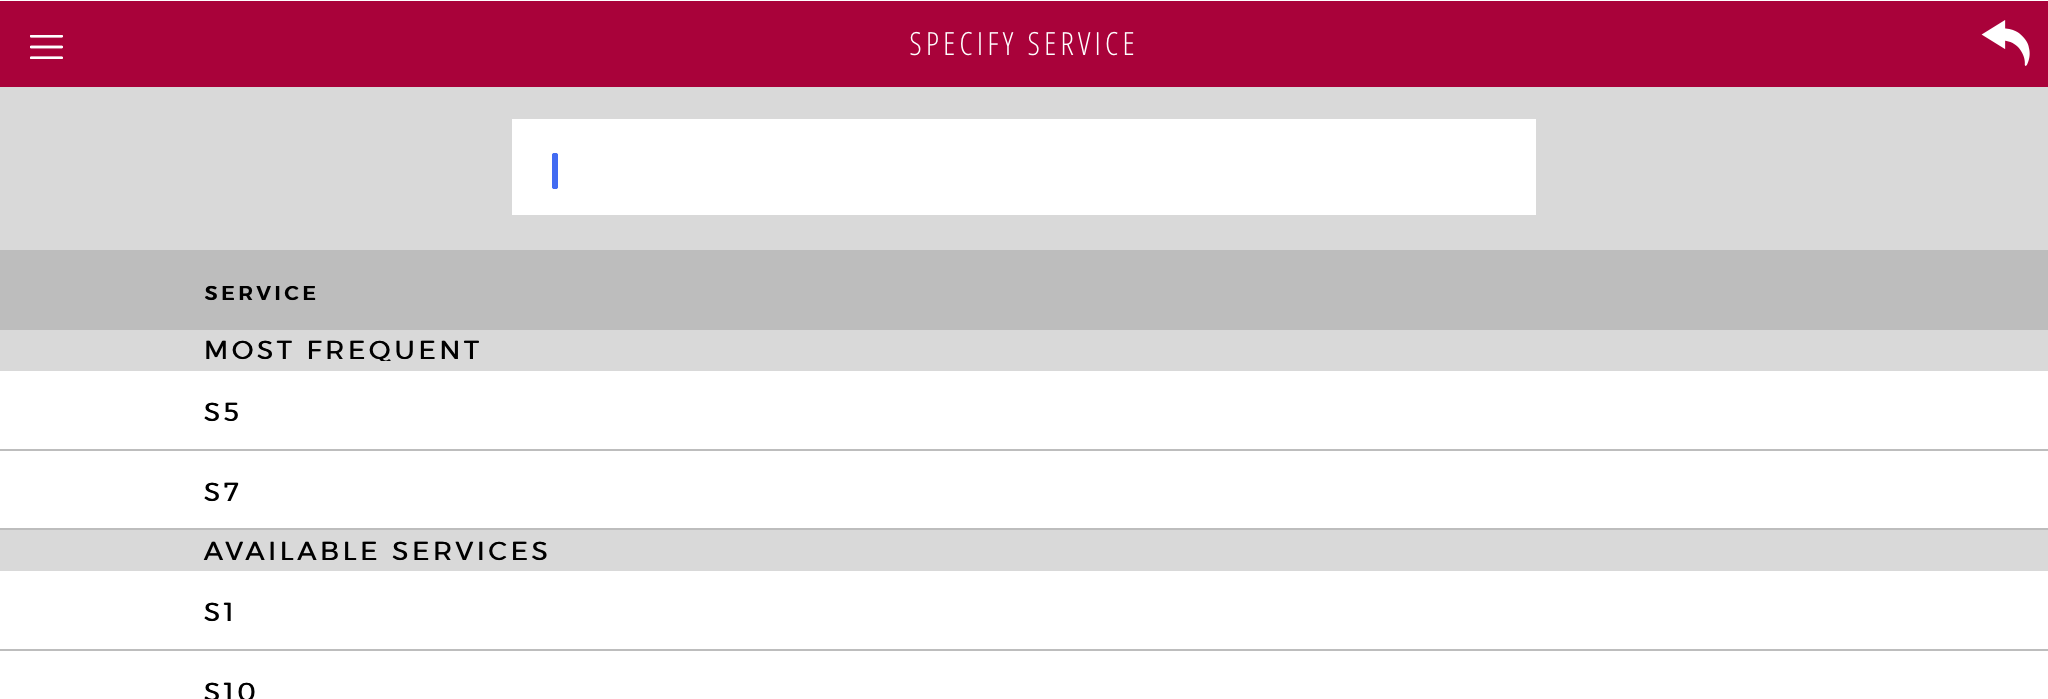
2. In the Specify Service banner, search for a Service. The found Services as well as the Most Frequent Services are listed below the Search field:

It is only possible to add
one Service to an Appointment.
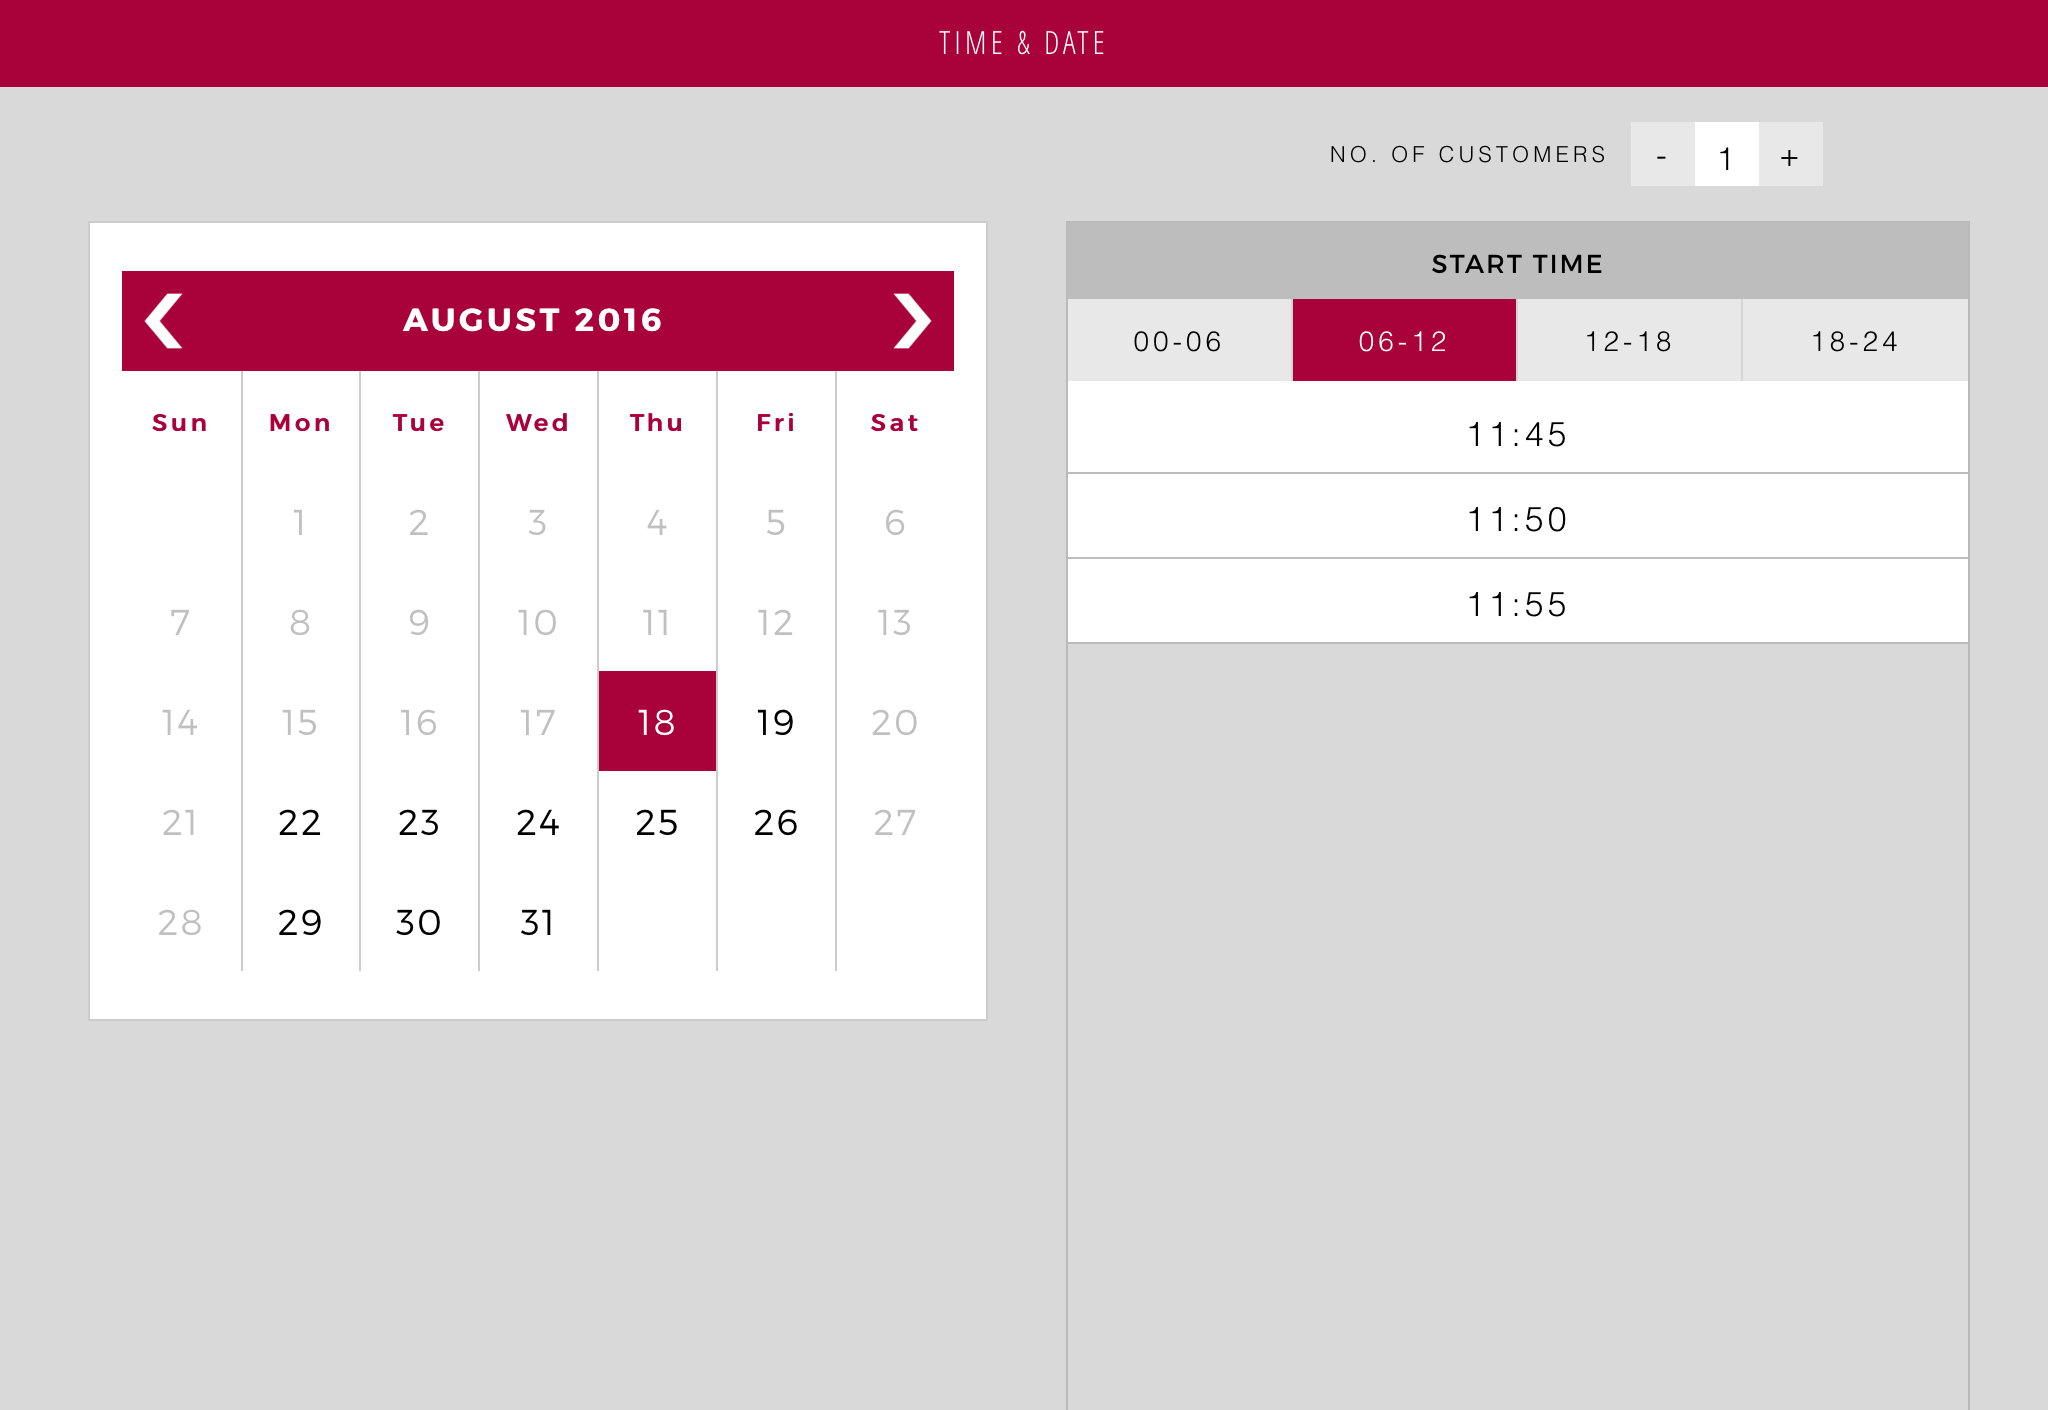
3. Next, in the Time & Date banner, select the wanted date, then time for the Appointment. In the date picker, the current day is marked with the branding color, if it is available for booking and in a light blue color if it not available, or not selected. If a date in the calendar is not available for booking, it is not clickable.
Available Start Times are displayed in a scrollable list, to the right, which is filtered into different time intervals, for example 06-12. The interval for the current time is displayed by default. Select the wanted time by tapping on it in the list. If you try to book a time that is already reserved by someone else, you will be notified about that.
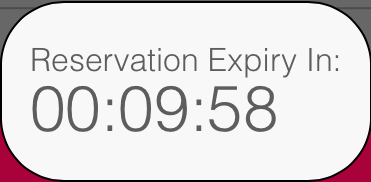
As soon as you select a start time, a widget counting down from 10 minutes, which is the reservation time, configured in Orchestra, will be displayed:
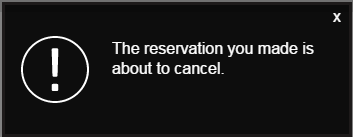
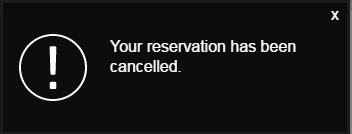
When two minutes are remaining, you will be notified about this and the same applies to when the reservation has been cancelled:
In this banner, you can also change the No. of Customers, which will update the list of Start Times accordingly, depending on your configuration in Orchestra.
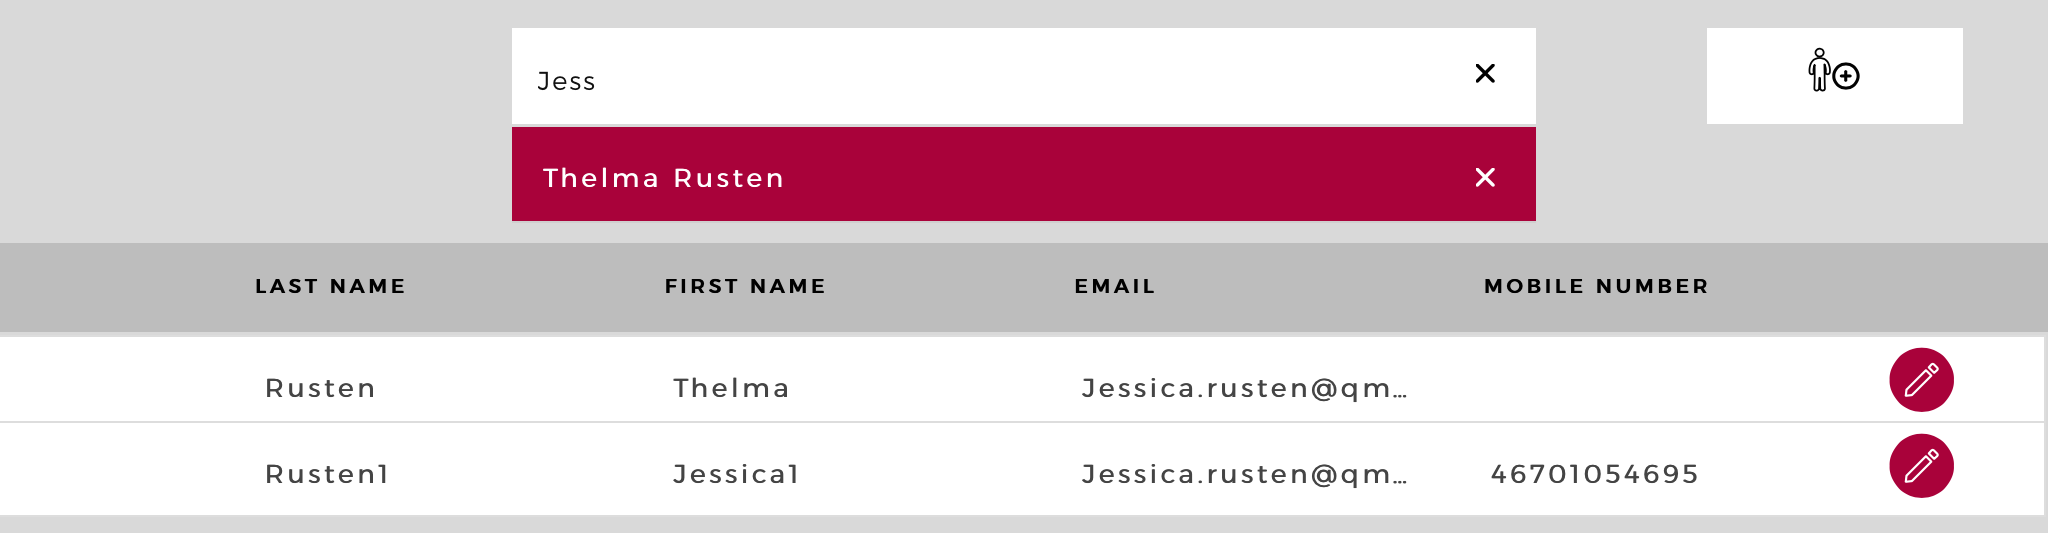
4. The next step is to search for a Customer to add to the Appointment, in the Identify Customer banner. Here, you enter the first name, last name, email or phone number of the Customer to find him/her. If less than 4 characters are entered as search criteria, it will be an exact match, e.g. if you enter "Per" only exact matches for users with first or last name Per will be displayed, not persons with for example last name Persson.
For phone numbers, a minimum of 5 characters must be entered before the search commences.
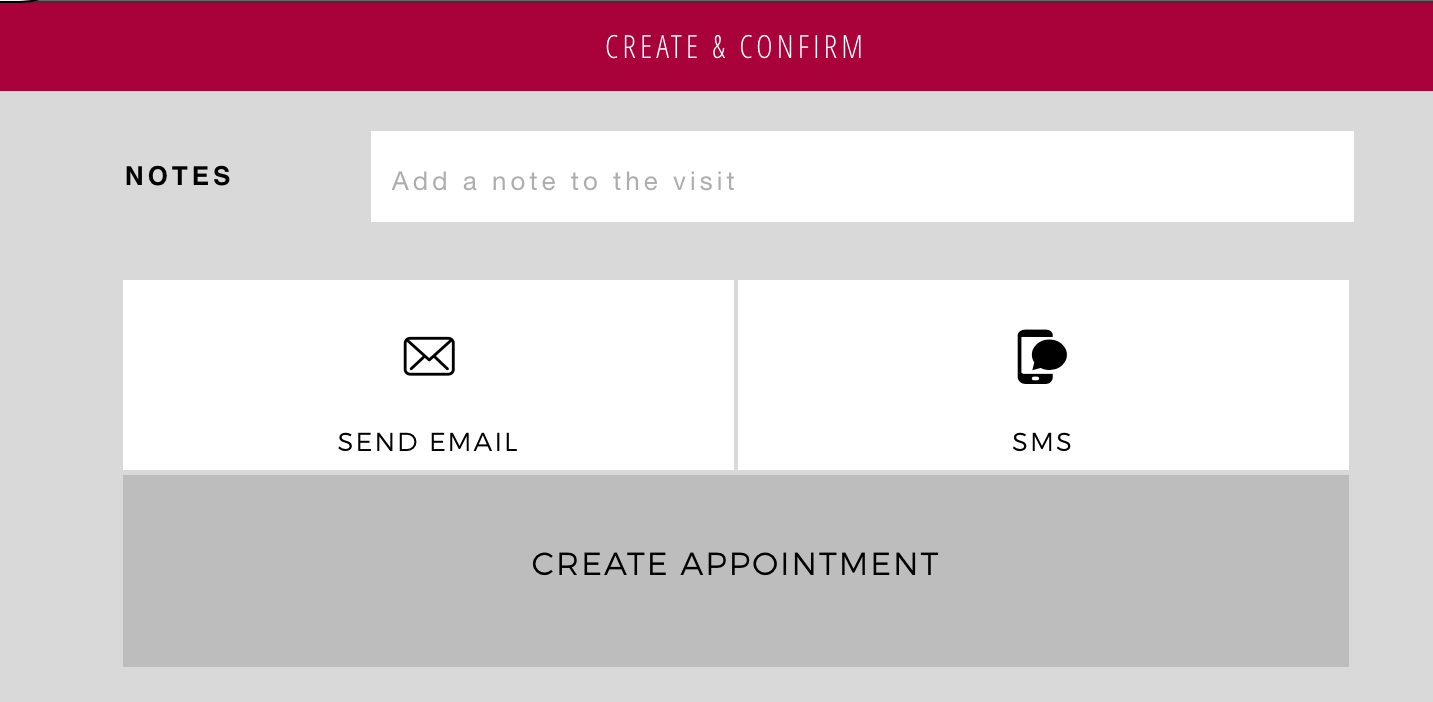
5. Optionally, in the Create and Confirm banner, enter a Note for the Appointment.
6. Finally, depending on how your system is configured, you can tap Send Email to send an email, or SMS, to send an SMS to the identified Customer. It is possible to select both Send Email and SMS:
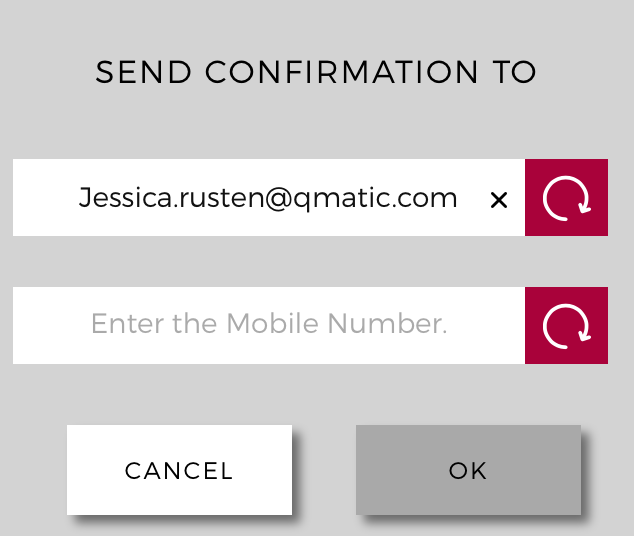
7. When done, tap Create Appointment. You will have the possibility to update the entered email address and/or phone number, or enter a new one. This may be an email address / phone number that is only temporary, i.e it should not be saved to the Customer record, but you can also decide to save it to the Customer record, by tapping the Update icon, in the popup.
The
Update icon changes when it has been tapped.
If you selected SMS or Email, the Customer will receive an SMS/email with the Appointment details.
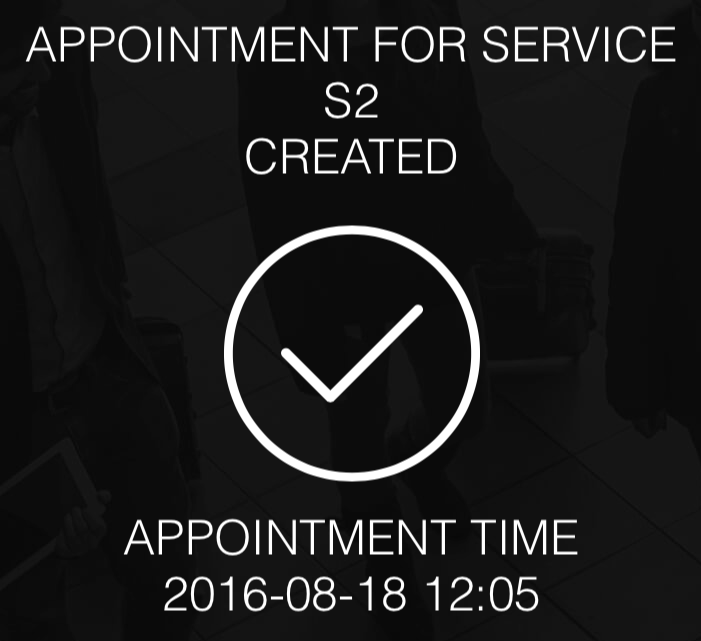
You will get a confirmation, containing all the Appointment details, that the Appointment was successfully created: