 Native app pages (System and User Settings) are branded with “Powered by Qmatic” logo and always use Qmatic red as accent color. Native app pages (System and User Settings) are branded with “Powered by Qmatic” logo and always use Qmatic red as accent color.
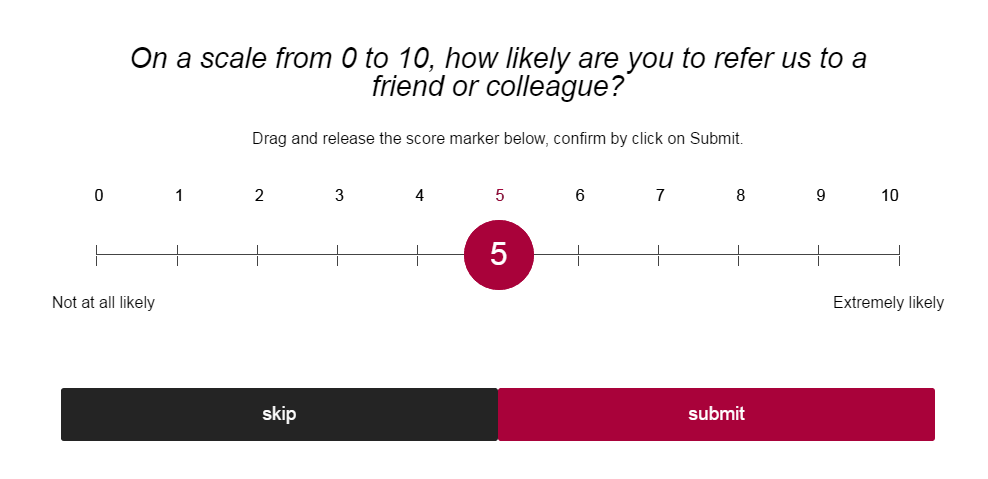
Parameter | Description |
Name | Name of the Unit. |
Description | Description of the Unit. |
Template name | Name of the Unit Type Template |
Template version | Version of the Unit Type Template |
Highlight color | Enter the hex color code of the wanted accent color here. For more information, please see “Branding” . |
Parameter | Description |
Name | Name of the Unit. |
Description | Description of the Unit. |
Type name | Name of the Unit Type. |
Type description | Description of the Unit Type. |
Unit id | Identification code of the Unit. |
Delivered Services | If this check box is checked, the Delivered Services panel will be visible. |
Outcomes | If this check box is checked, the Outcomes will be visible. |
Net Promoter Score | Use this check box to enable/disable Net Promoter Score (NPS). Enabled by default. |
NPS skip button | Enable/disable the Skip button for NPS. Disabled by default. |
Wear Voice Call Next | Disabled by default. When this setting is enabled, you can trigger the voice control, by twisting your wrist and saying “Call next”, or clicking the Next button. |
Show full screen ticket | If this check box is checked, the called ticket number will automatically be shown in full screen, when called.  Walk direct Visit numbers are never shown in full screen. Walk direct Visit numbers are never shown in full screen. |
No Show Button | If this check box is checked, the No Show button is available. |
Walk Direct button | If this check box is checked, the Walk Direct button is available. |
Transfer to user's pool | If checked, transfer to the logged in User's Pool is allowed. By default, this is disabled. |
Transfer to service point's pool | If checked, transfer to the Service Point Pool on this Service Point is allowed. By default, this is disabled. |
Quick button - call screen (Left) | From the drop-down list, select which button should be available as a quick button to the left of the Next button on the call screen. The available choices are: Walk Direct / Close. If no item is selected, no quick button will be available. |
Quick button - call screen (Right) | From the drop-down list, select which button should be available as a quick button to the right of the Next button on the call screen. The available choices are: Walk Direct / Close. If no item is selected, no quick button will be available. |
Quick button - serve screen (Left) | From the drop-down list, select which button should be available as a quick button to the left of the Next button on the serve screen. The available choices are: Walk Direct / No Show / Delivered Service/Outcome / Delivered Service/Outcome History / Transfer / END. If no item is selected, no quick button will be available. |
Quick button - serve screen (Right) | From the drop-down list, select which button should be available as a quick button to the right of the Next button on the serve screen. The available choices are: Walk Direct / No Show / Delivered Service/Outcome / Delivered Service/Outcome History / Transfer / END. If no item is selected, no quick button will be available. |
Default walk direct service | From the drop-down list, select the wanted default Service for Walk Direct. If no selection is made, all Services will be available. Note that this setting is only used by the Mobile Connect widget and the Flic button. For more information, see the Orchestra User’s Guide. |
Auto close | Automatically close Mobile Connect Counter after this time of inactivity (seconds). |
Reconnect timer | In case of weak network, this timer indicates how long time the app will keep trying to reconnect. Default is 15 minutes. |
Parameter | Description |
Default name | Default name of the Unit. |
Description | Description of the Unit. |
Number of units (max 127) | Enter the number of units to create when publishing this unit to a configuration. |
Unit Identifiers | A table with unit identifiers, which is dependant on which Number of units you have entered in the field above. So, if the number 4, for example is entered, the table will automatically get 4 rows. The two columns of the table are: • Name - Name of the unit, by default the name of the unit plus a sequential number, for example WebReception 5 or WebServicePoint 2. Can be changed to anything, so long as the name is unique, within the Branch. • Logic Id - An ID used in the connectors. The Logic Id continues with the next number in the sequence of the auto generated ID's within the Unit Type (e.g. Service Points, Entry Points, or Presentation Points). The number can be changed to anything, in the range of 1-9999, as long as it is unique within the Service Point, Entry Point, or Presentation Point. Example: If you have a total of 4 units and let the first three keep the automatically set Logic Id’s 1-3, then manually set the fourth unit to Logic Id 12, then change the Number of units to 5, the fifth unit will automatically get Logic Id 4. |
Unit id | Identification code of the Unit. |
Queues view | If this check box is checked, the Queues overview is visible. |
Waiting summary view | Show number of waiting Customers and max waiting time for current work profile. Enabled by default. |
Transfer Button | If this check box is checked, the Transfer button is available. |
Note View | If this check box is checked (default), the Edit/Add Notes view is available. |