Getting Started With Connect Concierge
The following section describes how to get started using Connect Concierge.
Prerequisites:
• While installing Orchestra, select the Connect Concierge application in the installation wizard. If you will be using Appointments, you also need to install the Calendar application and if you want to use notifications, you also need to install the Notification application. For more information, see the Installation chapter of the Reference Manual, found on Qmatic World.
• If you want to translate Connect Concierge, use the connectConciergeMessages.properties file. For more information, see the Localisation chapter of the Reference Manual, found on Qmatic World.
• If you are using a distributed setup, make sure that you have a good and stable connection to Orchestra central.
Limitations:
• Connect Concierge is only tested on Wi-Fi networks. Also, we recommend that you use a stable Wi-Fi connection, conformed to the number of Users.
• Connect Concierge is only available for tablets.
After installation, follow these steps:
Unit Types
1. In the System Administration application, add the wanted Concierge Unit Type(s), depending on if you want to use Connect Concierge with or without a printer and what kind of printer you want to use.
If you want to use notifications, you should also add the Notification Unit Type.
2. When you have added the Unit Type(s), check their configuration. For example, you can select a Highlight color for Connect Concierge. When done, click Save.
For more information about the Unit Types, please see the Standard Unit Types Guide, found on Qmatic World.
3. In the Business Configuration application, add the wanted Connect Concierge and Notification Unit Type(s) to your Equipment Profile.
4. Configure the Unit Types, in your Equipment Profile. On this level, there are quite a few settings that need to be configured. For example, you need to select which flows that you should have access to, which kinds of transfer between Queues that should be allowed, which notification method options (sms/email) that should be available, and what should be the default country code, used in the app. When done, make sure that you Save your Equipment Profile.
For more information about the Unit Types, please see the Standard Unit Types Guide, found on Qmatic World.
5. Next, configure the Unit Type(s) for each of your Branch(es). On Branch level, you for example set the IP address of your printer(s), whether or not it should be possible to add Notes to the Visit, and the time interval for when Appointments should be fetched.
Here, you also configure which events that should be available in the Notification application. Make sure that you Save and Publish each Branch when done!
For more information about the Unit Types, please see the Standard Unit Types Guide, found on Qmatic World.
Users and Roles
6. In the User Management application, select the wanted Roles for the Users that will be using Connect Concierge. There are two Roles to choose between:
• ConciergeAppointmentUser - can run Connect Concierge Visit and Appointment work flows on assigned Branches.
• ConciergeVisitUser - can run Connect Concierge Visit work flows on assigned Branches.
7. If you will be using Appointments together with Connect Concierge, make sure that your calendar User has access to the correct Branches.
Calendar
8. If you are going to use Appointments (Create Appointment, Arrive Appointment and Edit Appointment flows) together with Connect Concierge, you need to configure the Calendar. This is done in the
Calendar Admin application. For more information, see
“Calendar” . In addition to the normal setup, the following steps should be specifically considered for Connect Concierge:
a) Make sure that you have configured the Reservation Expiry Time setting on the System Settings tab to your liking.
b) On the Services tab, you should consider if you want to add Additional customer duration time to your Services, as in the following picture:

Note that Connect Concierge automatically selects available dates and time slots, depending on what is set up in the
Calendar Admin application.
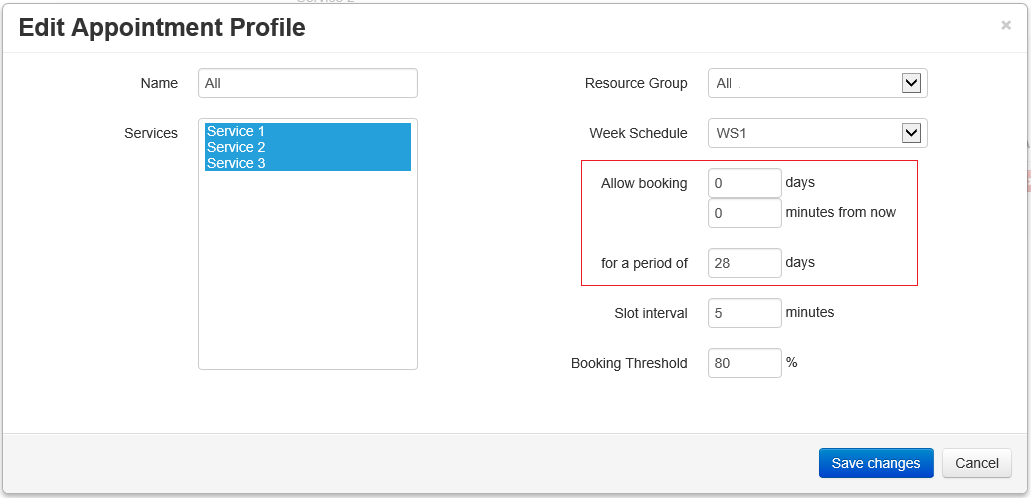
c) When creating your Appointment Profile(s), you should consider the Allow booking setting, as in the picture below:
This setting will have affect on which days that will be available for booking, in the Connect Concierge flows.
Notification
9. If you are going to use notifications together with Connect Concierge there are a few steps that you need to follow in the
Notification application. For more information, see
“Notification” . In addition to the normal setup, the following steps should be specifically considered for Connect Concierge:
a) Make sure that you have configured the Visit Create and Appointment Confirmation sub tabs, since these are mandatory when using all flows in Connect Concierge.
b) In the Appointment Confirmation/Appointment Reminder sub tabs, check the Check Interval (Minutes) setting so that it is to your liking. This setting may cause a delay if it is set to a high number.
c) Make sure that you select Other Appointment field (please specify) in the Phone Field drop-down list. Then, enter phoneNumber in the field below.
d) If you want to use a QR code in your Email messages, you need to use the qrCodeInternalId parameter and we recommend that you select HTML as Content Type. This way the QR Code will be included in the email, instead of in an attachment.
Now you are ready to start using Connect Concierge. For more information, please see the User’s Guide, found on Qmatic World.